

")
How to Clean Laminate Floors Without Damaging Them (A Step-by-Step Installer’s Guide)
G’day, Perjam from Floor Market here. Over the years, I’ve installed hundreds of beautiful laminate floors across Australia. But my job doesn’t end when the last plank is laid. I often get calls weeks or months later, with the same panicked question: “Perjam, my floor looks dull and streaky! What am I doing wrong?”
Nine times out of ten, the culprit isn’t the floor—it’s the cleaning method. People see a durable floor and think they can attack it with buckets of water and harsh chemicals like they would old tiles. That’s the fastest way to ruin your investment.
The great news is, cleaning laminate is incredibly simple, if you know the rules. I’m here to give you the step-by-step guide that I give all my clients. This is the no-nonsense, pro-installer method to keep your laminate looking brand new for years.
Summary of Key Steps
- Always Dry Clean First: Sweep or vacuum up all loose dirt before any liquid touches the floor.
- Use a pH-Neutral Cleaner: Avoid harsh chemicals, oils, or soaps.
- Damp, Not Wet: Your mop should be lightly misted, never dripping. Excess water is laminate’s worst enemy.
- Work in Sections: Clean and dry one area at a time to prevent streaks.
- Tackle Spills Immediately: Don’t let spills sit and soak in.
The Golden Rules: What NOT to Do
Before we get to the “how-to,” let’s cover the “never-evers.” Avoiding these common mistakes is half the battle.
1. Never Use a Steam Mop
I don’t care what the ads say. Steam is hot, pressurised water. It will force its way into the joints of your laminate planks, causing them to swell, warp, and peel over time. It’s a guaranteed way to destroy your floor and void your warranty. Just don’t.
2. Never Use a Soaking Wet Mop
This isn’t a tiled floor. You don’t need a bucket and a string mop. Excess water will seep into the seams of the laminate. Even with water-resistant laminate, standing water is a risk. It can damage the fibreboard core and cause the edges of the planks to bubble up.
3. Avoid Harsh & Abrasive Cleaners
Bleach, ammonia-based cleaners, abrasive powders, and even dish soap can damage the protective wear layer of your laminate. They can leave a dull, streaky film that is very difficult to remove or can even strip the finish entirely.
4. Say No to Oil Soaps and Waxes
Products that promise to add a “shine” (like oil soaps, waxes, or polishes) are a disaster for laminate. They don’t absorb and instead leave a greasy, dull residue that attracts more dirt and footprints.
The Pro Cleaning Kit: What You’ll Actually Need
You don’t need a cupboard full of fancy products. My entire cleaning kit for laminate is simple and effective.
- A Soft-Bristle Broom or Vacuum: Make sure your vacuum has a hard floor head or a setting where the beater bar (the rotating brush) is turned off. A spinning beater bar can scratch the surface.
- A Microfibre Mop: This is your most important tool. A flat-head microfibre mop is perfect for capturing dust when dry and cleaning effectively with minimal water when damp.
- A Spray Bottle: This allows you to control exactly how much liquid goes on the floor.
- A pH-Neutral Floor Cleaner: Look for a product specifically formulated for laminate or hardwood floors. These are designed to clean effectively without leaving a residue.
- Clean, Soft Cloths: For spot cleaning and buffing.
The Step-by-Step Guide to a Perfect Clean
Follow these steps, and I guarantee a streak-free, beautiful floor every time.
Step 1: The All-Important Dry Clean
Never skip this. You must remove all the loose grit, dust, and pet hair first. If you don’t, you’re essentially turning that grit into sandpaper when you start mopping, which can cause micro-scratches.
- Method: Gently sweep with your soft-bristle broom or vacuum the entire floor with the hard floor setting. Pay extra attention to corners and edges where dust bunnies love to hide.
Step 2: Prepare Your Cleaning Solution
- Method: If you’re using a store-bought pH-neutral cleaner, follow the dilution instructions on the bottle. If it’s a ready-to-use formula, simply fill your spray bottle.
- The DIY Option (Use with Caution): For a simple homemade solution, you can mix 1 part white vinegar to 10 parts warm water in your spray bottle. The vinegar helps to break down grime without leaving a film. However, always check with your flooring manufacturer first, as some don’t recommend vinegar. Never use apple cider or other types of vinegar.
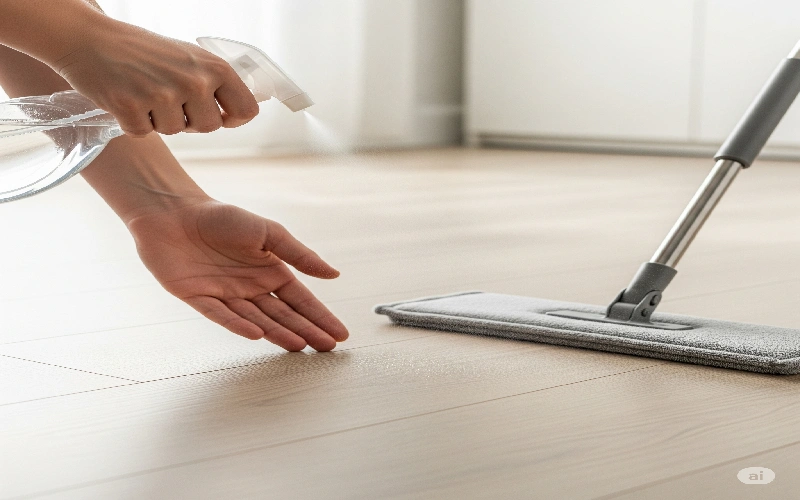
Step 3: The “Mist & Mop” Technique
This is the core of the method. Remember: damp, not wet.
- Method: Lightly mist a small section of the floor (about 1-2 square metres) with your spray bottle. The floor should look slightly dewy, not puddled. Immediately run your clean, damp microfibre mop over the area. The mop should glide easily and lift the dirt.
Step 4: Work in Sections & Go with the Grain
- Method: Continue misting and mopping in manageable sections. By the time you’ve finished the second section, the first should be almost dry. This prevents water from sitting and stops streaks from forming. If possible, mop in the same direction the planks are laid to further minimise visible streaks.
Step 5: How to Handle Tough Spots & Spills
For everyday spills or sticky spots, direct action is best.
- Scuff Marks: Often, a simple pencil eraser or a tennis ball can rub a black scuff mark right off.
- Grease or Ink: Apply a small amount of acetone (nail polish remover) or rubbing alcohol to a clean, white cloth (never directly to the floor). Gently dab the spot until it lifts, then wipe the area with a damp cloth to remove any residue. Test in an inconspicuous area first.
Step 6 (Optional): The Final Buff
If you’re worried about streaks or want an extra bit of lustre, grab a dry, clean microfibre cloth or a spare dry mop pad. Once the floor is dry, quickly buff over the entire surface. This picks up any remaining moisture and leaves a perfectly even finish.
Keeping Your Floors Looking Great
You’ve invested in a beautiful, durable floor from our laminate flooring in sydney. With the right care, it will look amazing for years to come. And if you ever need a flawless installation for a new project, you know our professional laminate installation service in Sydney has you covered.
Have a question or need advice on the best floor for your home? Don’t hesitate to get in touch.
Give me a call directly on 0475575575 for a chat. I’m always happy to help!
Frequently Asked Questions (FAQ)
Q: Seriously, I can’t use a steam mop at all? Even on the lowest setting? A: That’s right. I cannot stress this enough. Steam is the enemy of laminate flooring’s core. Using it will void your warranty and lead to costly damage. Please trust me on this one.
Q: What’s the best cleaner to buy for laminate floors? A: Look for any reputable brand that specifies “pH-neutral” and is “safe for laminate or hardwood.” Avoid “mop and shine” products or anything that promises to add a polish.
Q: How can I get rid of the cloudy film on my laminate floor? A: A cloudy film is usually residue from the wrong cleaner. You can often remove it by mopping with the vinegar and water solution (1 part vinegar to 10 parts water), as the acidity helps break down the build-up. You might need to do this a couple of times to fully remove it.
Q: Is a Swiffer WetJet safe for laminate floors? A: While convenient, I’m cautious with WetJets. The cleaning solution can sometimes leave a sticky residue, and it’s easy to put too much liquid on the floor. If you use one, ensure the cleaning pad is only damp, not saturated, and use a solution that’s specifically approved for laminate floors. My “mist and mop” method gives you more control.